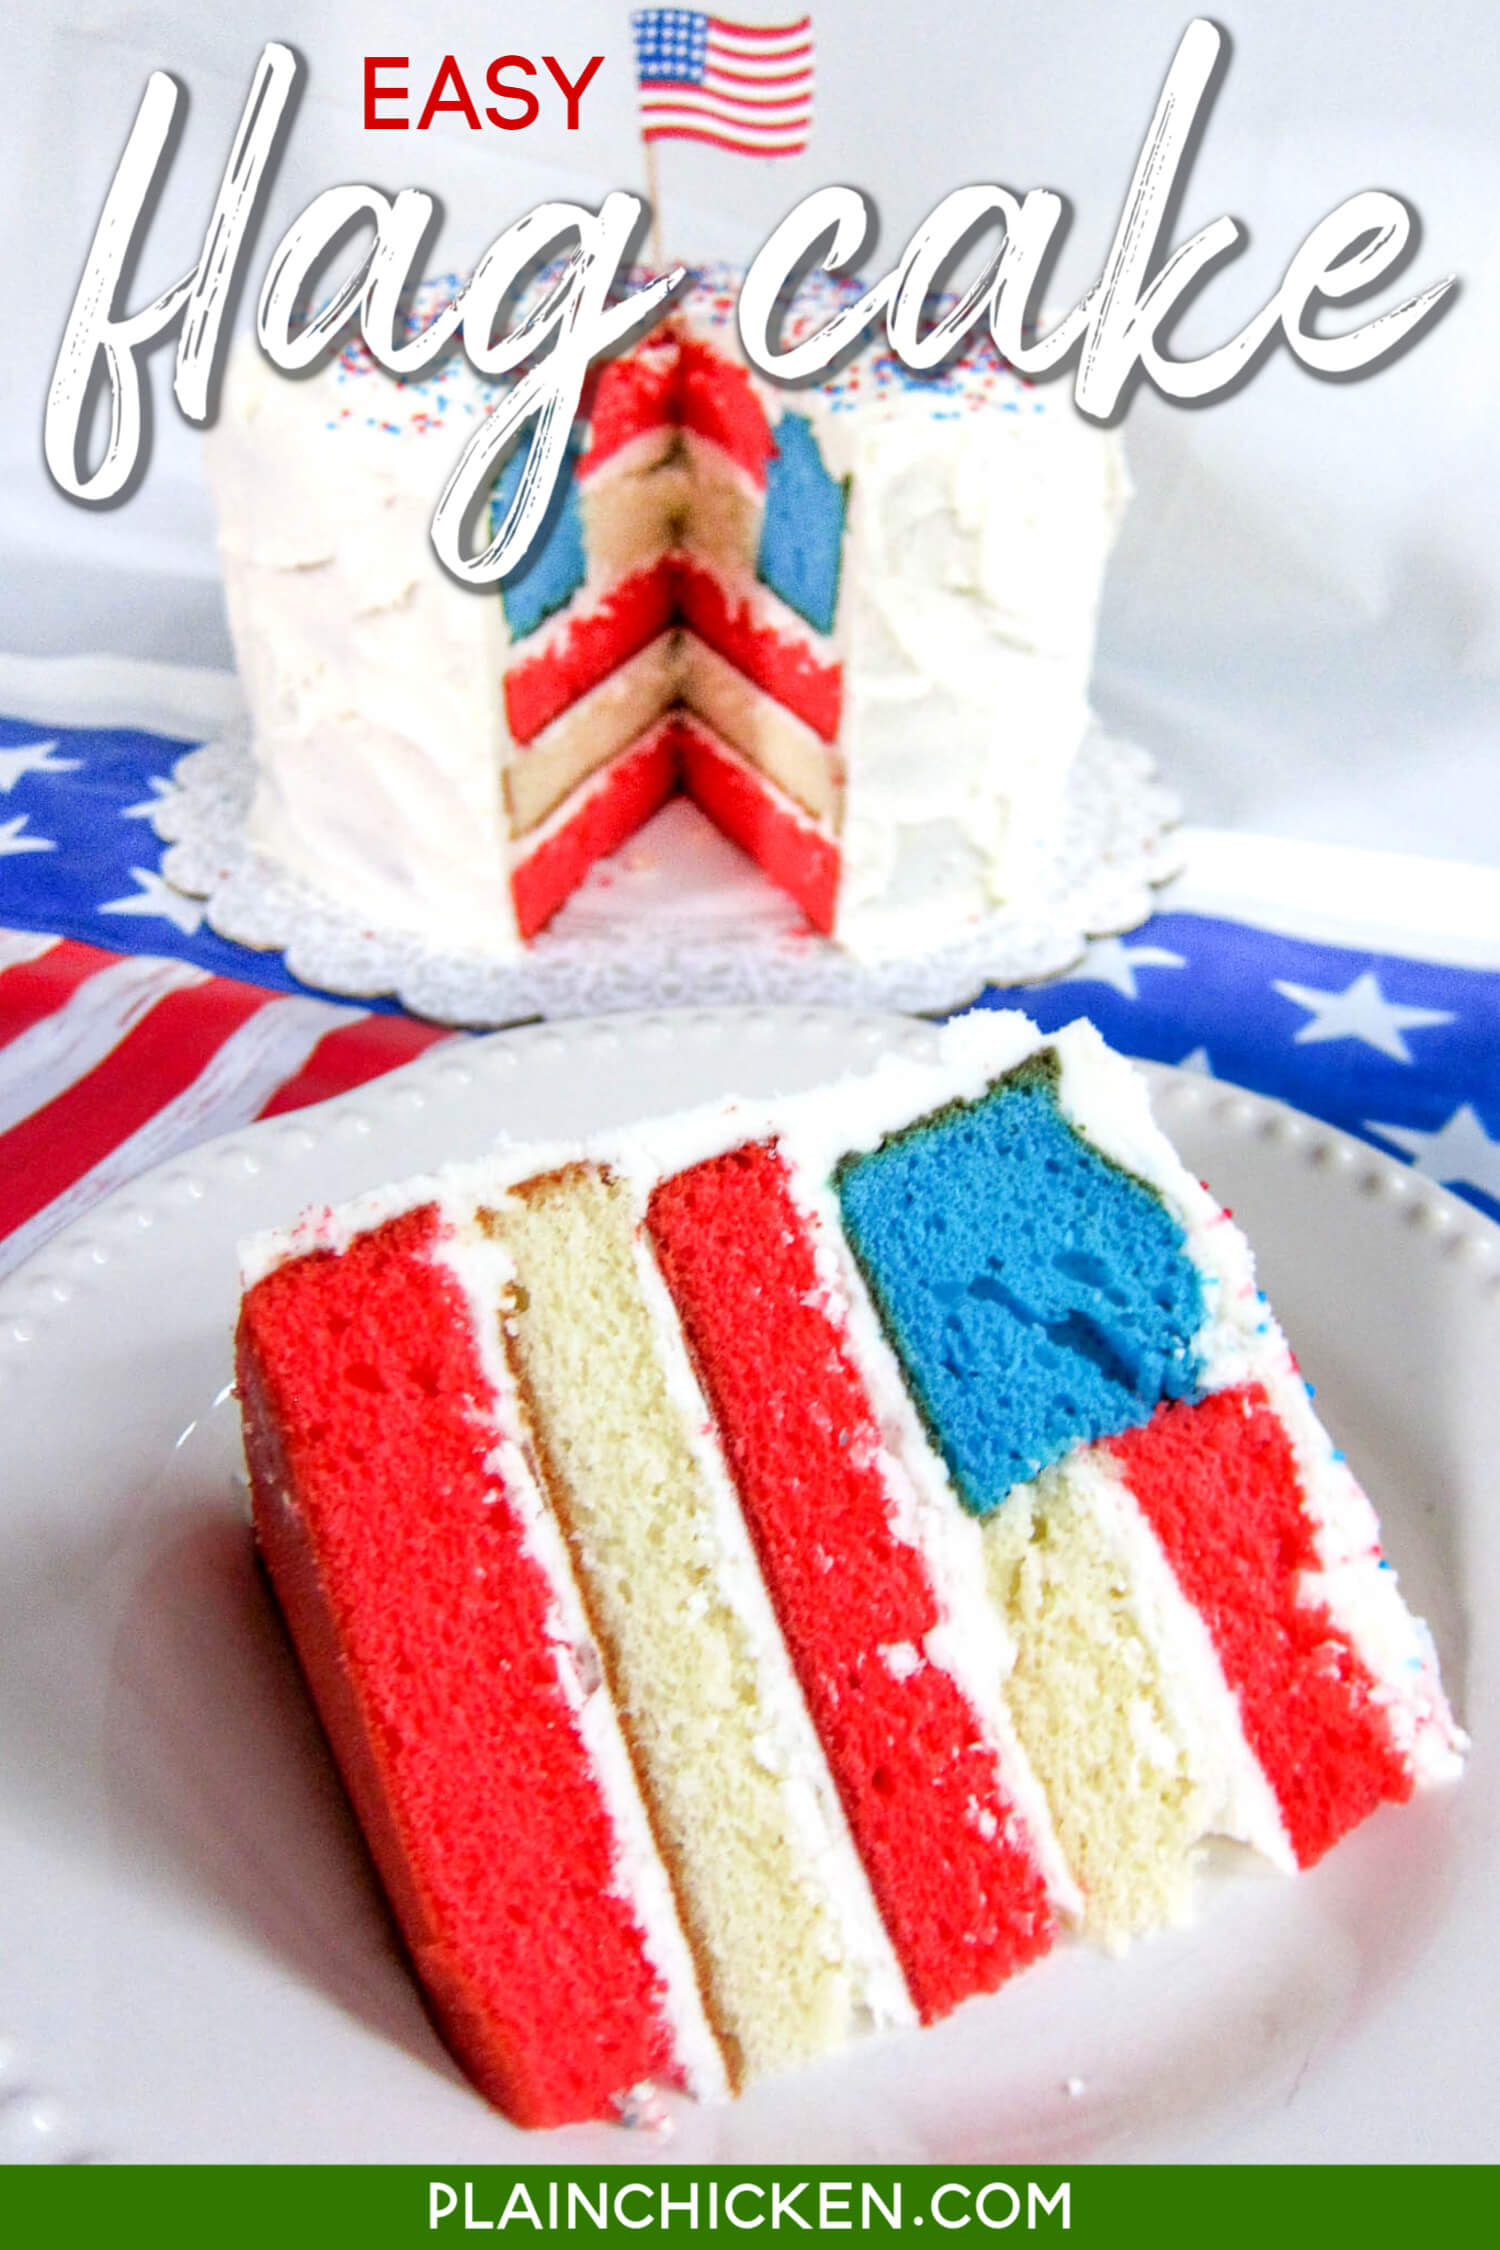
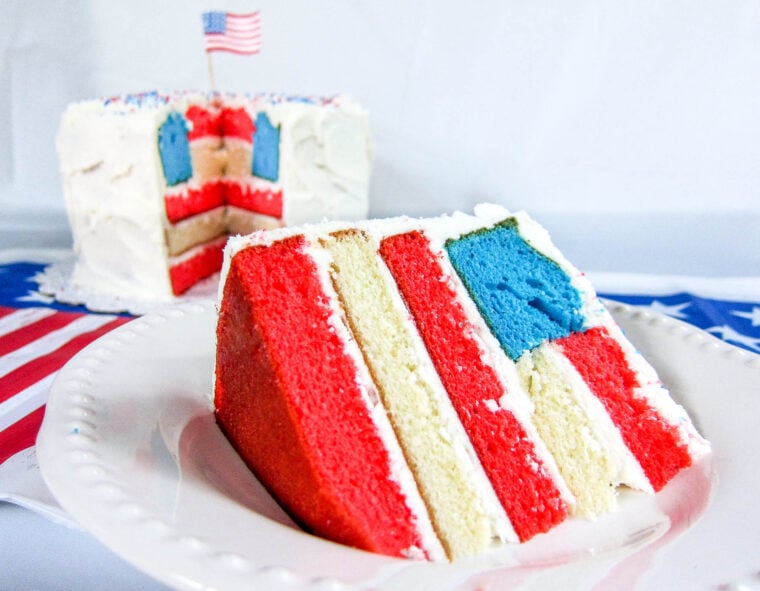
Flag Cake Recipe – transform cake mix into a festive Flag Cake that is perfect for Memorial Day, 4th of July, and Labor Day! It is actually really easy! Bake the cake layers, make a few cuts and assemble. SO impressive and festive!

Remember this recipe.
Pin this recipe to your favorite board now to remember it later!
Pin This RecipeAre you looking for a 4th of July dessert with a lot of “wow factor”? Well, look no further than this 4th of July Flag Cake! Isn’t it amazing?! This is much easier than it looks. I used a box cake mix and made some buttercream frosting, but feel free to use canned frosting or make both from scratch. If you use canned frosting, beat it with your mixer before frosting the cake. It will give it a nice light and fluffy texture.
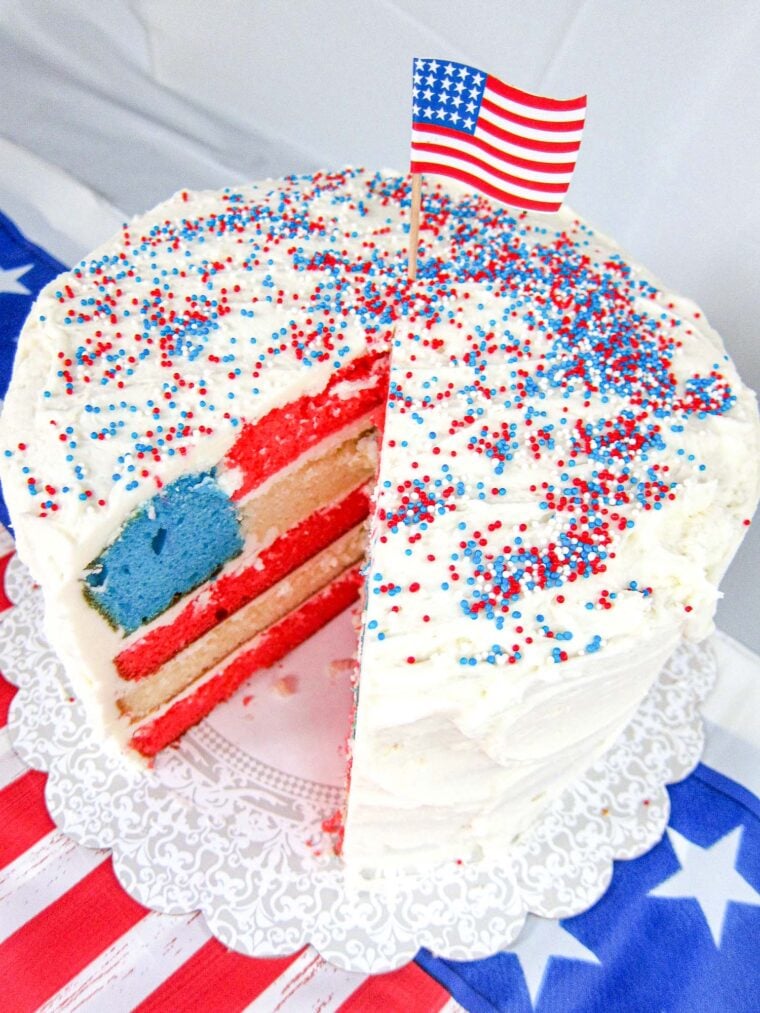
To make the cake, start with baking 2 boxes of white cake mix. Use food coloring and tint one box of cake mix red, one cake layer blue and leave the final layer white. Bake the cakes and cool completely. Cut the red and white cake layers in half so you have four red cake layers and 2 white layers. Leave the blue cake layer as one.
Now you are ready to assemble the cake. Layer cake red/white/red. Cut a 4-inch circle in the middle of a red layer, white layer, and the blue layer. Place the blue layer on the cake and press the white layer in the center of the blue layer followed by the red layer.
Now, I know this is confusing, so I have a fun video for you to show you how to do this:
WATCH How To Make 4th of July Flag Cake
This cake is super easy to make so SO festive! It is great for Memorial Day, Flag Day, 4th of July and Labor Day. It is the perfect ending to your holiday cookout!
Here are a few of our favorite recipes to complete your holiday meal:
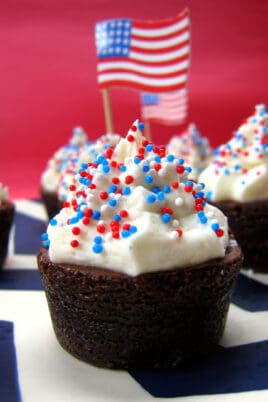
Patriotic Brownie Bites
Are you looking for a super simple dessert recipe to take to your 4th of July party? These brownie bites…
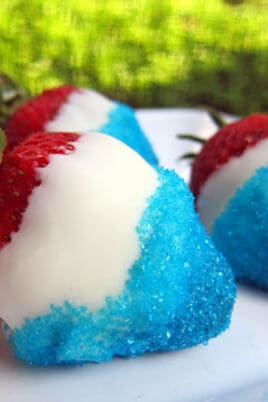
Berry Patriotic Strawberries
I love Memorial Day! It is the first holiday at work (that’s always a good thing), and it is the…

Dr Pepper Chili Dogs
Dr Pepper Chili Dogs Recipe – hot dogs topped with a sweet and tangy homemade Dr. Pepper chili – great…

Ranch Burgers
Ranch Burgers – seriously THE BEST burger recipe EVER!! Ground beef, ranch, Dale’s seasoning, Worcestershire sauce, bacon, and fried onions…
Easy Flag Cake
Ingredients:
Cake
- 2 boxes white cake mix, plus ingredients to make cake
- red food coloring – recommend gel food coloring
- blue food coloring – recommend gel food coloring
Buttercream Frosting
- 1 cup butter, softened
- 6 cups powdered sugar
- 2 tsp vanilla extract
- ½ cup whipping cream
Instructions:
- Grease and flour two 8-inch cake pans. Prepare one box of cake mix and color it red. Divide the batter equally into the two prepared pans. Bake as instructed on the box. Allow to cool and remove from pans.
- Grease and flour the 8-inch cake pans again. Prepare remaining cake mix. Pour half of the batter into one of the cake pans. Color the remaining batter blue and pour into remaining cake pan. Bake as instructed on the cake mix box. Cool and remove from pans.
- You will end up with 1 (8-inch) round blue cake, 1 (8-inch) round white cake and 2- (8-inch) round red cakes.
- Using a serrated knife or cake leveler, slice the red and white layers horizontally in half. So you have one blue layer, four red layers, and two white layers. Set one white and two red layers aside, those will be the bottom three stripes of the flag.
- Using a 4-inch cookie cutter, cut a circle out of remaining white layer and another circle out of one of the remaining red layers. (You will not use one of the red layers) Finally cut a 4-inch circle out the center of the blue cake.
- You will have 2 (8-inch) layers of red, 1 (4-inch) layer of red, 1 (8-inch) layer of white, 1 (4-inch) layer of white and 1-(8-inch) layer of blue with a 4-inch circle cut out of the center.
- Prepare the buttercream frosting. In the bowl of an electric mixer fitted with the paddle attachment, cream butter until smooth and creamy, 2 to 3 minutes. With mixer on low speed, add 6 cups sugar, whipping cream (or milk), and vanilla; mix until light and fluffy. If necessary, gradually add more powdered sugar to reach desired consistency.
- To assemble the cake, frost the bottom three layers together – set the uncut red layer on cake plate and spread with frosting. Top with the uncut white layer and spread with frosting. Top white layer with the uncut layer of red cake and spread with frosting. Set blue cake ring on top and place the white inner circle on top of the uncut red layer, inside the ring of blue. Frost, and top with the red inner circle. Frost the entire cake and top with sprinkles if desired.
Notes:
Steph
Remember this recipe.
Pin this recipe to your favorite board now to remember it later!
Pin This Recipe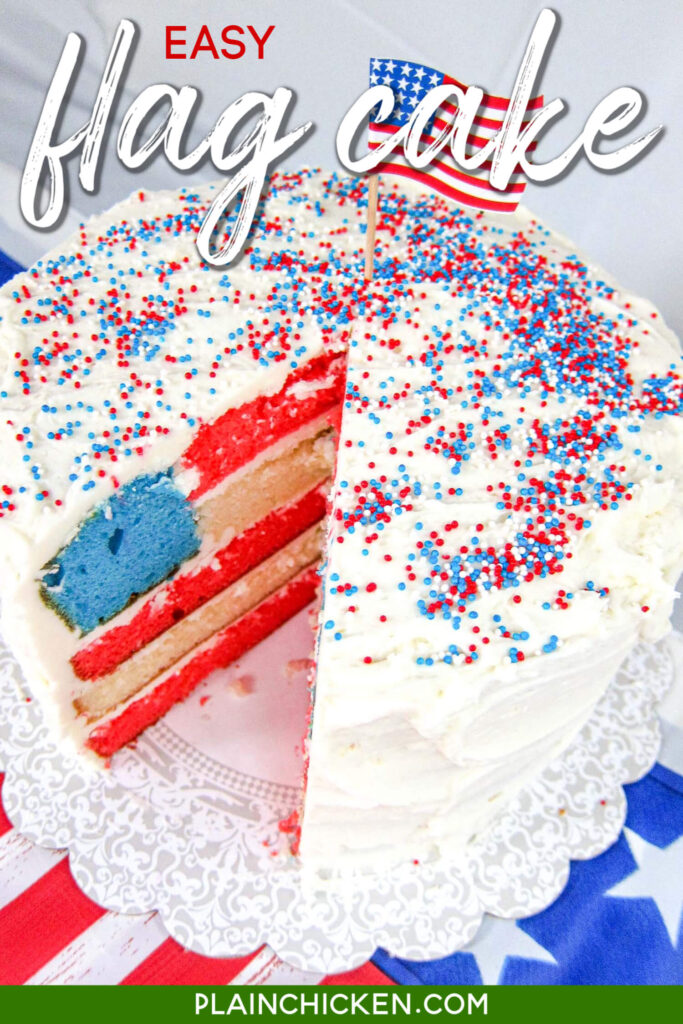


This looks really great! I can't wait to make it. Just some feedback though, this is easy to make I can see, but the information and directions would be much more easily digestible with just one or two in progress shots, showing you layering it. We're just dealing with a lot of different little cake pans and stacking, so think a photo or two would quickly help show 🙂
I had a little difficulty following your written directions, and would have liked to see the steps in picture form. I think I can visualize it now, but a picture IS worth a thousand words. THANKS for sharing! -Mo
So cool! I pinned it on Pinterest and can't wait to make it this summer! : )
ted1laura – what a great idea! I bet the strawberries really added great flavor to the cake
I made this cake with my 4 yr old and it was so much fun to make. I added sliced strawberries in between the layers which was really good! Thanks for a great recipe!
I made this last night for a picnic today! Easy, and it looked and tasted great!
Rasputin – I wrote milk but I actually used whipping cream. Sorry about that! I'll fix it.
Am I just missing the milk portions for the icing?
Cool! I think it might be even cooler to try to make a 13-layer cake with alternating layers of red and white, leaving the blue the same as it is here.
Holy moly. Love the surprise factor on this one.
Absolutely brilliant cake!
Very pretty and patriotic!
Happy 4th of July to ya'll.
loved this cake for forever! yours looks gorgeous! making it for the 4th this year and I hope it comes out as good as yours! 🙂
Wow1 Very creative!
Wow! That does look awesome! Thanks for the detailed instructions.
I'm so impressed! That looks awesome!